By Cael's first birthday, I had a goal to make a canvas growth chart. Knowing full well that we won't be living in this apartment forever, I wanted to have something to chart his growth that we could take with us, as opposed to penciling his growth on the wall. So I did some searching on Pinterest and the internet. There were ones that you could make using wood, but I didn't want to bother with wood. I wanted something that could be easily folded up and stored if need be. So then I came across
this blog searching the internet, and I fell in love with the idea. Following her instructions, and tweaking them a little, I completed Cael's growth chart in about 2 days. Here is what I did!
I started with 2 yards of brown duck canvas cloth, that I found at Walmart. I laid it on a giant craft cutting board (also found at Walmart for about $5), and lined up the finished edge of the canvas along the 1" line. I cut the fabric in a strait line following the 12" line, making the fabric 11" wide. I used Cael's toys to hold the fabric down well, so that I could get the fabric mostly even.
After cutting the strip of fabric, this is what I was left with. It was 2 yards long (roughly 6 feet). I knew I had plenty of fabric left over in case I made a mistake in cutting, but I didn't need it. To make sure it was perfectly even, I folded the fabric in half, to determine how even the edges were. I lined it up on the cutting board, and trimmed the fabric along the edges to make sure it was strait and even. This would be important shortly when it came to hemming the edges, so that the chart would look strait up and down when it hung on the wall.

The next step is to hem the edges so they don't fray. The original blog used a Z-stitch to sew the edges, to prevent fraying. I don't have a working sewing machine, though, so my only option was to use a Heat n Bond hem. I made the hem roughly the same width as the hemming tape, so that the raw edge didn't have much leeway to fray. I pre-creased the hem with the iron, so that it would be easier to apply the hem tape. I eyeballed the width while ironing it, and fortunately, it came out even.
I hemmed 3 out of the 4 edges, knowing that I was going to bring up a good part of the bottom of the chart. I didn't want it hanging all the way to the floor. I could have gotten away with hemming only the sides, and leaving the top and bottom edges raw - since they'll both eventually be hemmed - but I wasn't thinking about that.
This is the chart with the hems done. Please don't mind the mess of toys in the background. I don't have a clear area anywhere in the house for a nice, pretty backdrop :).
You can see the edges after it's hemmed are perfectly strait. If I didn't trim the edges by folding it over, then they wouldn't have come out nice and strait.
Time to start the stenciling! I picked up 1.5" letter/number stencils from Walmart for $3.99. I also picked up a pack of foam brushes, and white acrylic paint, made for porous surfaces. I had the clear ruler - if you have clear, it's much easier - Sharpie marker, and smaller stencils laying around (so I'm glad I saved the stencils years ago! I knew I would eventually get some use out of them). Time to get to work!
Using the Sharpie marker and ruler, I made small marks at every inch going up the entire length of the chart.

Then, only using the odd numbers, I placed the number from the smaller stencil roughly 1" from the edge of the chart. I measured the width of my clear ruler, and it was 1", so it was a good guide by lining it up with the edge of the chart. I then placed the number I was stenciling fairly close to the inside edge of the ruler. Using the foam brush, I dabbed the paint carefully onto the stencil. Be careful to not use too much paint, as it may bleed under the stencil, and ruin the appearance of the number. Even though I was going to take up about a foot or so from the bottom, I still stenciled the numbers. It was good practice to figure out what method worked best, to reduce the bleeding. I eventually tried cutting a corner off the foam brush, so it would be more precise, but that didn't work too well either. I ended up using a watercolor brush from upstairs to gently, slowly and carefully dab the paint on. This reduced the bleeding under the stencil.

I also figured out that it is best to use odd numbers for the inches, instead of even numbers, so that when you stencil the numbers for each foot, you don't have double numbers. Since each foot is an even number (12", 24", etc), you would end up with two numbers next to each other. And even if you left out the inches for the corresponding foot, I think it would still look funny.
When I finished the numbers for each odd inch, I then stenciled the larger, 1.5" number stencils to mark each foot. I placed the foot markers 3 inches from the edge of the chart, in the same manner as I did the inches.
Here is the canvas with all the number stenciled on. Can you spot the mistake?? . . . . . . No? Look closer. . . . Yup, I put the "1" in the wrong spot!! At this point, it was 11pm, and I had been working on this all day, so a mistake was bound to happen. Without realizing, I stenciled the "1" between the 13 and 15 inch marks, instead of between the 11 and 13 inch marks. I started freaking out, until Matt reminded me that I'll be taking the bottom up. ::Insert HUGE sigh of relief:: I almost started crying, and at that point, I stopped for the night. I finished the rest of the foot markers the next morning.

Next, it was time to paint on the lines. Once again, the ruler came in handy to make strait lines. For each odd numbered inch, I painted a .5" line; for each even inch, I painted a 1.5" line; and for each foot marker, I painted a 2.5" long line. I didn't bother painting a longer line for the 1 foot mark, since it won't be seen anyway. Once again, I had to experiment with the brushes to find which one worked best to paint a neat, thinn-ish line. Here, the foam brush that I cut to make a sharp edge worked best. You have to work carefully and slowly to make sure you don't accidentally make the line thick.
So the lines are all painted, as seen below. I pinned up the bottom so that the chart starts at 15.5". This makes it so that my chart doesn't hang to the ground, AND it hides the mistake that I made with the 1 foot mark.
The original blogger used a piece of melamine board as a weight to help weigh down the chart, and help it hang strait. Unfortunately, I didn't have any melamine board, and wasn't sure where to find it. Being the impatient person that I am, and wanting to just get the chart done, I searched the apartment for anything that I could use. Luckily, I found these! They're hardwood floor samples (which were FREE, by the way, from The Home Depot ::wink wink::) that we picked up last year, before Cael was born. Mind you, we never did lay new flooring. Anyway, these would work perfect, as they are the perfect size and weight. I ended up taping the two together to make it more stable.

So I pinned up the bottom, and inserted the wood samples into the pocket that was created. I then moved the pins down, so that it created a snug "pocket" for the samples. I knew I was going to do 2 rows of the heat tape, just to make it extra strong, considering the weight that will be supported by it. I then trimmed the excess fabric off after measuring how wide I'd have to leave the pocket after the tape. I didn't want any extra fabric past where the heat tape ended. I then inserted the first row of heat tape, ironed it, and then did the second row. I let it cool completely before putting the wood samples in.

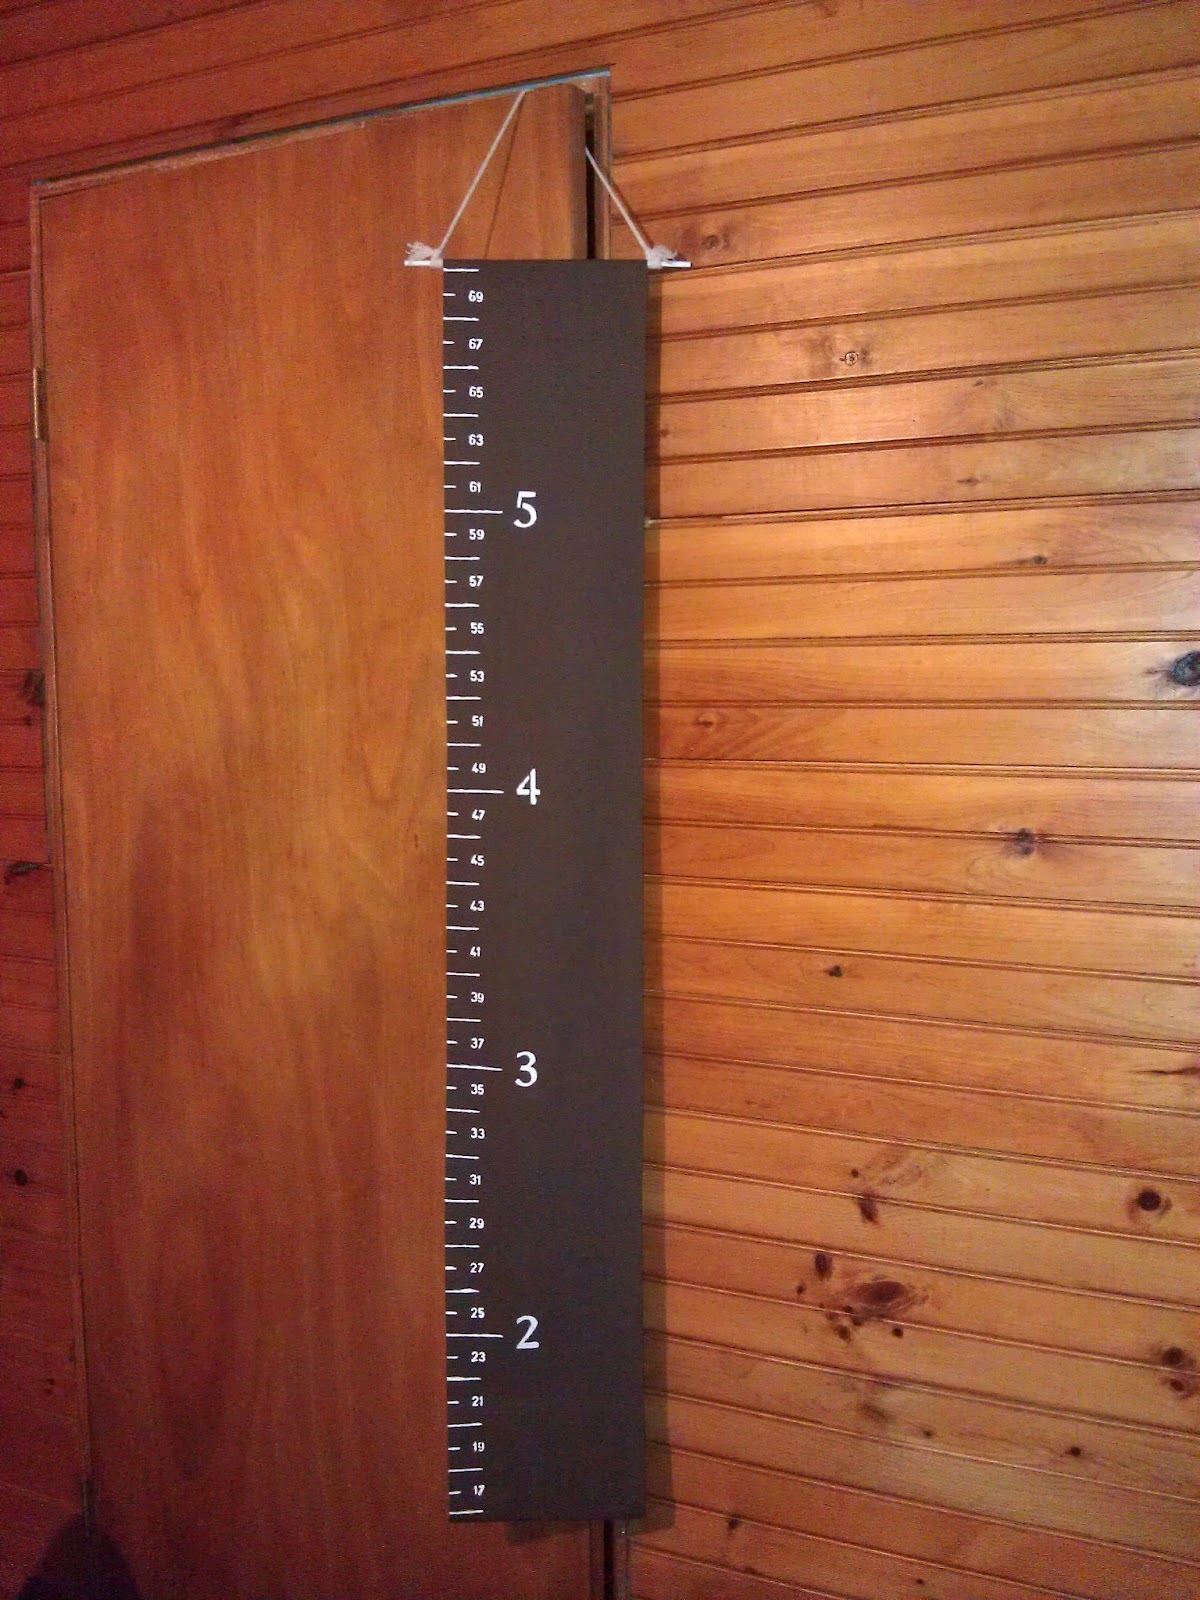
Finally, to finish off the chart, you have to be able to hang it. I used a dowel that I had from making "mustache's on a stick" for Cael's birthday party. I painted the ends white with the acrylic pain, and let it dry. After it dried, I folded the top of the chart over the dowel, and pinned it. It was about 1.5" that was folded over. I then applied a strip of the heat tape, ironed it, and let it cool. I then tied the cord on each end. I found cord at Walmart for $.37 a yard. I only bought a yard, because I wouldn't need that much. I left about an inch long "tail" and after it was knotted, and I frayed the tail because I liked how it looked.
Voila! In about 2 days, you have a no-sew canvas growth chart!
After wondering how I was going to mark it (since I chose a dark color), I came across paint markers. I bought a silver color, and tested it on the piece of canvas I cut off the bottom. It shows up nicely. So I plan to mark how long Cael was when he was born, and then start marking every month starting on his 1st birthday.


.jpg)


 To make the container that holds the mustaches, I cut the top off a Happy Baby puffs container. I then used the mustache duck tape I bought, and covered the sharp-ish cut edges of the top, and then around the bottom as well for decorative purposes. I then used the stencil I made to make the mustaches, to draw a mustache on the white container with black Sharpie marker.


.jpg)